Mono Stringer Staircase Deep Dive 2026
How mono stringer stairs work structurally, what drives fabrication cost in 2026, and what to coordinate before steel is ordered, a complete guide for Vancouver homeowners and designers.
Vancouver Stairs fabricates mono stringer staircases with a single central steel beam, simple in appearance, precise in engineering. Understanding the structure helps every decision that follows.
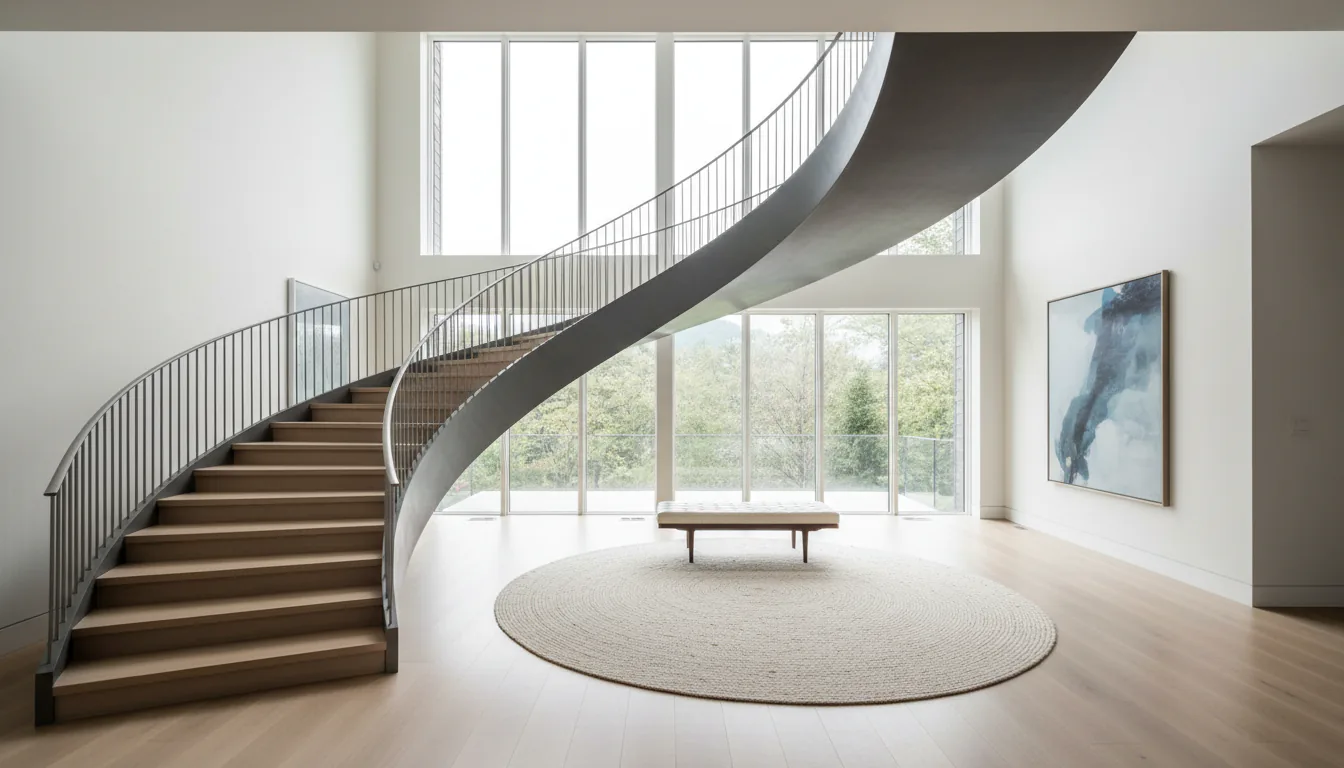
A mono stringer staircase uses one central steel beam to support the treads. That single beam gives the stair its clean, open profile, the view through the stair is clear, the sides are visually light, and the stair reads as part of the architecture rather than a box in the room. But the simplicity is surface-level. The beam, brackets, and connection points have to do everything a conventional two-stringer stair distributes across a wider structure.
Understanding what drives the design helps every decision that follows: beam sizing, tread choice, railing attachment, installation sequence, and budget.
How the structure actually works
A conventional stair has two side stringers that each carry roughly half the load from every tread. A mono stringer concentrates all tread loading into a single central beam. Every step pushes down on one bracket, which transfers into the beam, which transfers into two anchor points, the top landing connection and the bottom floor connection.
The implication is that both anchor points are structural details, not just attachment points. The top landing needs to accept a moment load (the stair pushing and pulling as people walk it) in addition to vertical loading. The bottom anchor needs to resist the same. In Vancouver renovations, existing framing rarely sits exactly where the design wants those connections. Site visits before fabrication, not after, is what separates a clean install from a project that discovers a problem when the steel is already on the truck.
The beam itself carries all the load in bending and torsion. Bending because the load is distributed along the span. Torsion because each tread bracket sits offset from the neutral axis of the beam, so every step applies a twisting force in addition to the vertical load. Beam sizing accounts for both, and longer spans increase both effects. A straight 10-step residential run behaves very differently from a 16-step run with an intermediate landing cantilevering off the beam mid-span.
How does beam size and profile affect the look of a mono stringer stair?
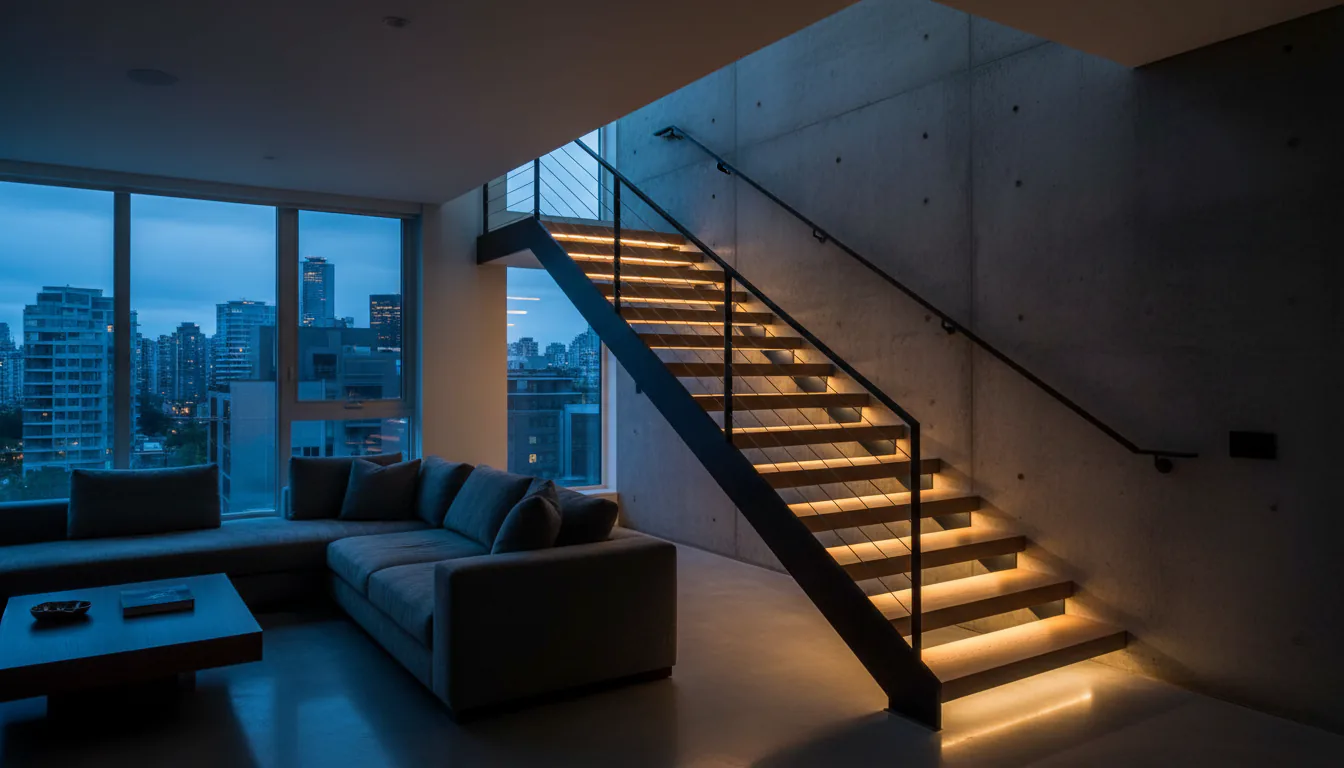
The beam sets the tone of the stair. A heavy rectangular HSS section reads industrial. A carefully proportioned wide-flange beam cut to a custom depth can feel architectural and quiet. A round tube reads softer and suits residential interiors that lean warm. The right answer depends on span, loading, finish, tread choice, and the room around the stair.
In our shop, we think about beam proportion in terms of depth versus visible width. A deeper beam handles longer spans with less deflection, but at some point depth starts to visually dominate the stair. The bracket detail at each tread is where beam and tread merge, and a bracket that is too thick or too abrupt undercuts the minimal quality that makes people choose a mono stringer in the first place.
Finish choices compound the visual effect. Matte black is the most common choice in Vancouver homes because it works against wood, glass, stone, and white walls without competing. Warm grey and bronze-black suit interiors that are using natural timber or earthy plasters. Clear-coat steel, showing the natural mill scale, is less common but appears on industrial-residential projects where the stair is meant to read as a fabricated object rather than a finished product.
How does tread material affect mono stringer fabrication and cost?
Wood, steel, stone, and concrete-look treads each attach differently, weigh differently, and affect what the bracket looks like from below and the side.
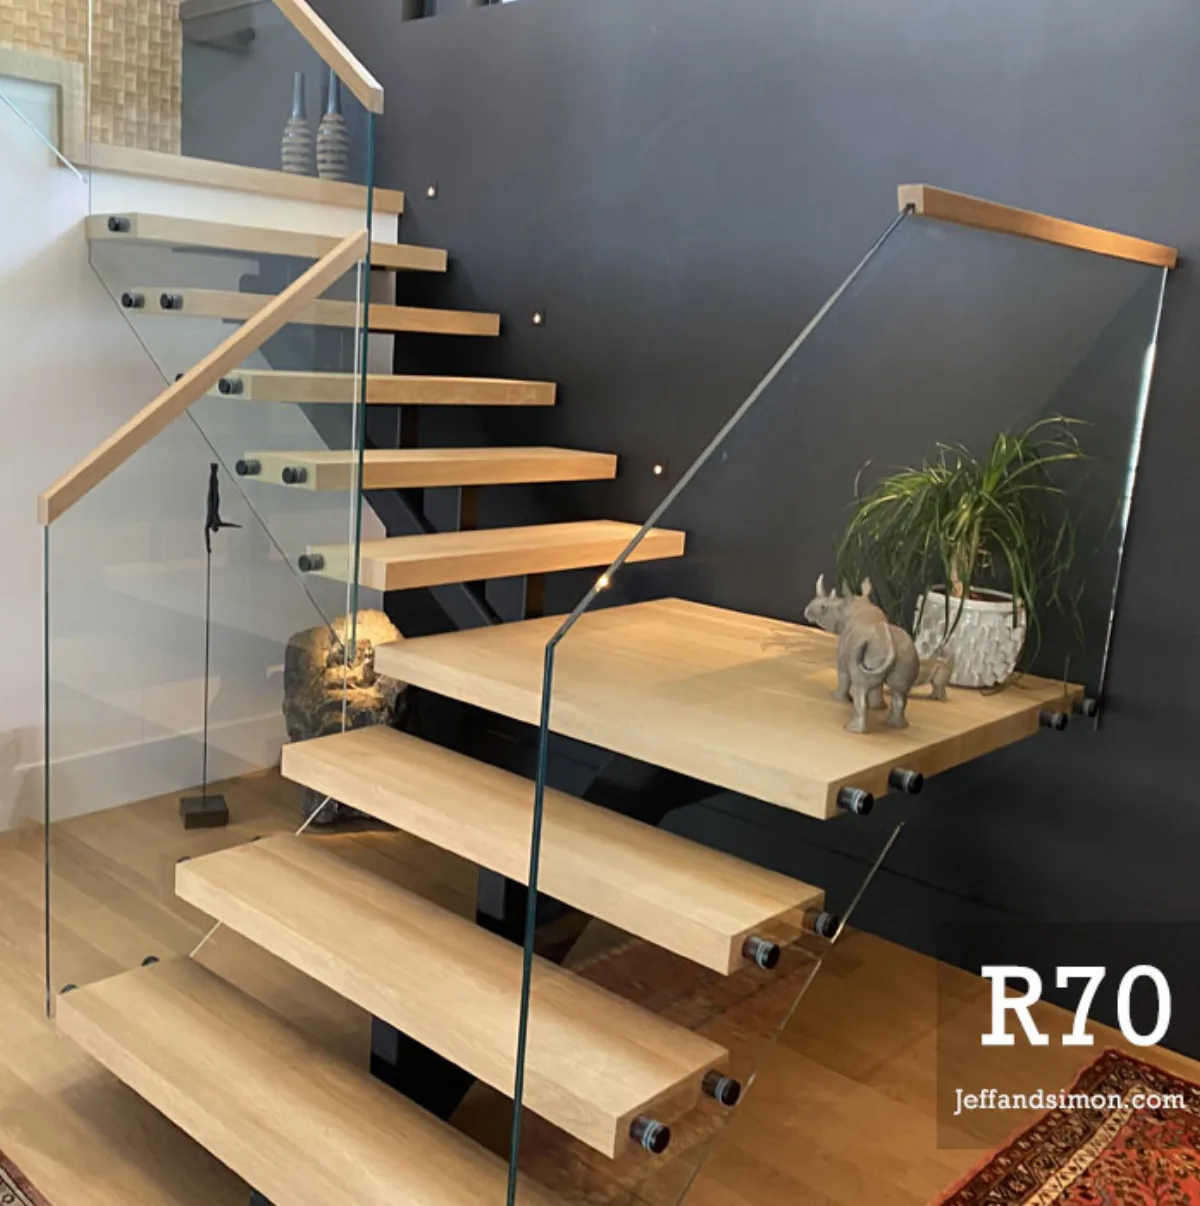
Wood treads (white oak, walnut, ash, maple) are the most common residential choice in Vancouver. They attach to a steel plate or saddle welded onto the bracket. Tread thickness, typically 44 mm to 65 mm for solid hardwood, determines how much of the bracket is visible from the side. A thicker tread can hide the bracket from most angles; a thin tread exposes it. Wood treads are usually finished separately (stained, oiled, lacquered) after installation, so the protect-and-sequence plan matters.
Steel plate treads read industrial and are common on commercial or exterior stairs. They weld or bolt directly to the bracket, which simplifies installation. Grating treads are used on exterior or industrial applications where drainage matters. Steel treads are finished with the beam, usually powder coat, galvanize, or a duplex system, so the full stair is one finish operation.
Stone and concrete-look treads (porcelain, engineered stone, tile-on-concrete-pan) add significant weight per step. A pan-and-concrete tread can weigh 30–50 kg per step, which adds up fast on a 12-step stair. That weight changes the structural calculation for the beam and the anchor loads. It also changes the installation sequence, concrete-fill treads go in after the steel frame is secured and inspected.
Tread thickness and overhang also affect the nosing detail and BC Code compliance. BCBC 9.8.4.5 limits nosing projection and requires consistency across treads. On an open-riser stair, the gap between treads is also checked against the 100 mm sphere rule.
Which railing system works best with a mono stringer stair?
Glass, cable, and steel guards can all work with a mono stringer, but each one changes what gets built into the stringer during fabrication. Planning the railing system after the steel is already cut means adding welds or drilling holes in finished work, both are expensive and risk the finish.
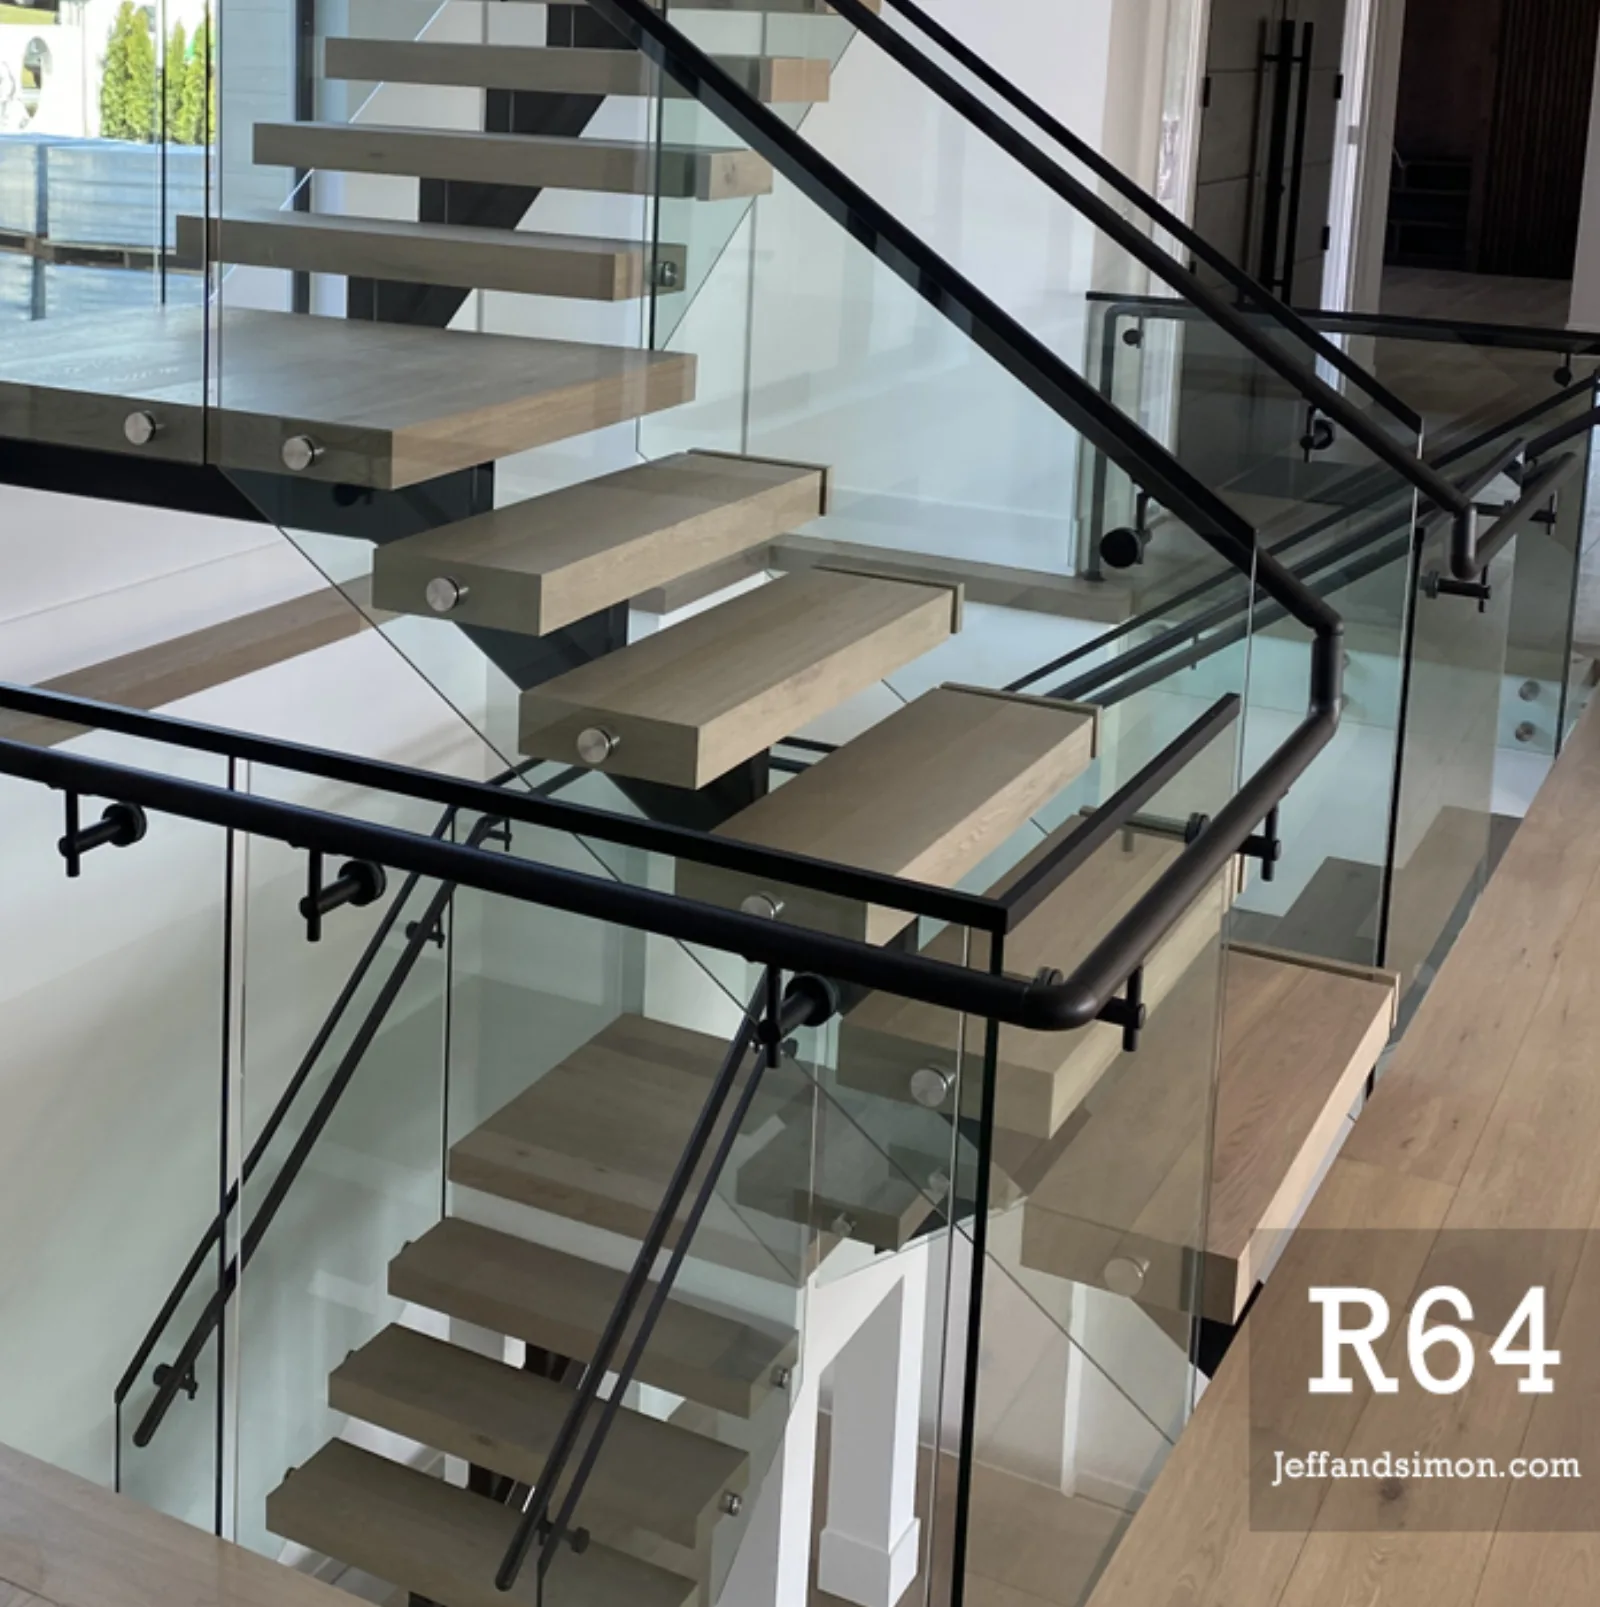
Glass railings are popular on Vancouver feature stairs because they keep the view through the stair open and pair well with the clean mono stringer profile. Frameless glass systems attach via a base shoe channel that gets welded to each tread bracket during fabrication. Semi-frameless systems use standoffs from the bracket. Either way, the bracket layout and the shoe position need to be in the fabrication drawings before steel is cut.
Cable railings are common on decks and exterior stairs where the view matters but glass is impractical. Cable attaches to posts mounted on the tread brackets or on a bottom rail shoe. Post spacing is critical for BC Code compliance, cables deflect under load, and the 100 mm sphere test is evaluated after deflection, not at rest. The cable railing specification guide covers the code requirements in detail.
Slim steel picket guards are less expensive than glass and more practical on stairs that see heavy use or renovation site traffic. The picket spacing drives the bracket layout the same way glass or cable does, so the answer still needs to be in the drawings before fabrication.
The cleanest projects choose the guard strategy before the stair is fabricated. Changing it afterward usually costs as much as getting it right the first time.
What are the structural connection requirements for a mono stringer stair?
As noted above, a mono stringer has two structural connections: top and bottom. Both need to be designed and confirmed before steel is ordered, because both drive what gets built into the beam and what the structure needs to accept.
The top connection is usually a bolted plate into a structural wall, a welded or bolted plate onto a steel header, or a hidden bracket into an engineered joist. In Vancouver renovations, the existing framing is often not where it needs to be, blocking needs to be added, a beam needs to be installed, or the header needs to be upsized. Those are GC-scope changes that need to happen before the stair is ordered.
The bottom connection is usually a base plate into concrete slab or a thickened floor detail. Concrete anchors need edge distance. Wood subfloor connections often need reinforcement to handle the moment loads. The exact anchor type depends on the substrate, and the fabricator needs that information before steel is cut.
In our shop, we resolve both connections in the shop drawing set before we order material. Moving a base plate 100 mm after fabrication usually means re-cutting the stringer or shimming on site. Neither is a clean outcome, and both add cost.
What drives mono stringer staircase fabrication cost in Vancouver?
A straight-run residential mono stringer stair in Metro Vancouver costs $18,000–$32,000 installed with cable railing and powder coat finish. Add glass guards and the same stair runs $28,000–$45,000. Longer spans, curved geometry, or premium tread materials push projects to $45,000–$65,000+. The main cost levers:
Span and geometry. A straight 10-step residential stair in a standard ceiling height is the simplest case. A switchback with an intermediate landing, a long-span stair over a double-height space, or a stair with curved geometry each add beam complexity, connection complexity, and engineering coordination.
Tread material. Wood treads at standard thickness are the baseline. Stone, concrete-fill, and custom steel treads each add material cost, weight management, and sometimes engineering review.
Railing system. Glass is the most expensive railing option per linear foot. Cable and steel picket are lower cost. The railing system is often where a project moves between budget tiers without changing the steel.
Finish. Powder coat is the standard. Hot-dip galvanize plus powder coat (duplex system) adds time and cost. Blackened steel or clear-coat finishes are shop operations that may affect lead time.
Engineering complexity. Conventional residential connections often proceed on prescriptive drawings. Cantilevered landings, long spans, and Part 3 buildings go through a structural engineer. Engineering fees, the review cycle, and the extra schedule time are real project costs.
What installation access does a mono stringer stair require?
The finished stair has to get into the building. A two-flight mono stringer can run 600–800 lbs per section. Even a straight residential run needs three to four installers, rigging straps, and a clear path from the curb to the install location. Tight entries, finished floors, limited crane access, and renovation sequencing can all change the plan.
For Vancouver renovations, where the rest of the house is often occupied or partially finished, the installation plan needs to address floor protection, ceiling clearance on the route in, and the sequence relative to other trades. The mono stringer stair installation guide covers the site preparation and trade sequencing in detail.
How does a mono stringer compare to double stringer and cantilevered support strategies?
The mono stringer is one of several support strategies that produce an open-riser, light-looking stair. Understanding where it fits helps narrow the decision before the fabrication conversation starts.
Mono stringer versus double stringer. A double stringer uses two beams, one on each side, or two beams hidden inside the tread, instead of one central beam. The double stringer spreads the load across two members and two connection lines, which simplifies the structural demand per beam. It also means the beams are usually smaller in section depth, which can suit installations where ceiling clearance under the stair is tight. The visual difference is meaningful: a mono stringer reads as a single spine, with the treads projecting symmetrically on each side. A double stringer reads as two parallel lines framing the treads from underneath. Neither is objectively better, the choice comes from the geometry, the span, the visual intent, and what the structure above and below can accept.
Mono stringer versus cantilevered wall-mount. A cantilevered stair mounts the treads directly to a structural wall, with no stringer visible at all. The stringer is either embedded in the wall framing or replaced entirely by steel brackets cast or bolted into a concrete or masonry wall. The result is the cleanest open-riser look, no beam, no brackets from the side. The engineering complexity and the structural requirement on the wall are both higher: every tread bracket carries the full tread load independently, and the wall needs to be designed to accept that load at each mounting point. Cantilevered stairs are common on concrete-core residential towers and custom homes where a concrete or reinforced CMU wall is already present. They are rarely practical in wood-frame renovation because the framing rarely meets the load requirement without major reinforcement.
Mono stringer versus open-web or plate stringer. Some fabricators use a laser-cut steel plate or an open-web truss form as a stringer, which can produce a profile that reads visually between a solid beam and a fully open structure. These are more common on feature stairs in commercial lobbies or architectural residences where the stringer itself is part of the design statement. Fabrication complexity and cost are generally higher than a standard HSS or wide-flange mono stringer.
The mono stringer versus double stringer comparison covers the structural and cost differences in detail. For a cantilevered stair, the cantilevered floating stair wall framing guide covers the wall-structure requirements specific to Vancouver renovation and new-build projects.
For a full overview of mono stringer staircase fabrication, including the engineering and cost detail behind this support strategy, see our hub page.
Sources
Related questions
What makes a mono stringer stair different from a side-stringer stair?
A mono stringer stair uses one central steel beam to carry the treads, instead of two side stringers or a fully concealed support system. That single beam transfers all loading through two connection points, top and bottom, which simplifies the visual profile but concentrates the structural demand.
Can mono stringer stairs use glass railings?
Yes. Glass railings are among the most common pairings with mono stringer stairs in Vancouver. The railing system attaches to the tread itself via a base shoe channel, or to standoffs welded onto the stringer brackets. The attachment strategy should be planned before fabrication so the correct holes and plates are built in.
How much does a mono stringer stair cost in Vancouver?
A straight residential mono stringer stair in Metro Vancouver typically starts in the $18,000–$28,000 range for steel, finish, delivery, and a standard install. Projects with longer spans, complex geometry, cantilevered landings, or premium tread materials move into the $35,000–$65,000+ range. Fabrication pricing is quoted per project after a site review and drawing set.
Does a mono stringer stair need a structural engineer in Vancouver?
Most feature mono stringer stairs require at least informal engineering coordination. Any stair where the top or bottom connection does not fall into conventional framing, where the span is long, or where there is a cantilevered landing will need stamped drawings. Part 3 buildings (commercial, multi-family) require a Designated Structural Engineer to seal drawings regardless of complexity.
Is a mono stringer stair the same as a floating stair?
No. A mono stringer is a support strategy, one central beam. A floating stair is a visual category meaning no visible risers and no visible side stringers. A mono stringer often looks floating, but floating stairs can also use a hidden double stringer, cantilevered brackets, or a wall-mount system. The terms describe different things and should not be used interchangeably.
What is the difference between a mono stringer and a double stringer?
A mono stringer uses one central beam; a double stringer uses two beams, one on each side or concealed inside the tread depth. The double stringer distributes load across two members, which can simplify the structural demand per beam and reduce section depth. The visual difference is significant: a mono stringer reads as a single spine, while a double stringer frames the tread from both edges.
What beam section is used for a mono stringer stair?
HSS (hollow structural section) square or rectangular tube and wide-flange (W-shape) beams are the most common in Metro Vancouver shops. Round tube is also used on residential projects where the softer profile suits the interior. Section size depends on span, tread load, and the allowable deflection, a fabricator or engineer calculates this per project. General trade knowledge sets common residential spans in the range of 150×150 to 250×150 HSS, but the actual size should be confirmed for each project.
How long does it take to fabricate and install a mono stringer stair in Vancouver?
Lead time depends on finish, engineering review, and shop load. Simple residential projects without engineered stamped drawings typically move faster than projects requiring a P.Eng review cycle. Confirm with a current quote, the schedule depends on the drawing set, material availability, and the install window relative to other site trades.
Can a mono stringer stair be installed in a wood-frame renovation?
Yes, but the existing framing often needs reinforcement at both connection points. The top landing connection typically requires added blocking or a steel header; the bottom slab or subfloor connection may need reinforcement to carry the moment load. Identifying those requirements from a site visit and drawing review, before steel is ordered, is what keeps a renovation mono stringer on schedule.
What finish options are available for mono stringer stairs in Vancouver?
Matte black powder coat is the most common residential finish in Metro Vancouver. Warm grey, bronze-black, and custom RAL colours are available through most shops. Clear-coat over mill-scale steel reads as a raw industrial material and suits projects where the stair is meant to look fabricated rather than finished. For exterior or semi-exterior installs, hot-dip galvanizing is appropriate under a topcoat, galvanize-only is generally reserved for fully enclosed or utilitarian applications.