Designing the Stair Opening Before the Steel Arrives: What GCs Need to Confirm
A custom steel staircase succeeds or fails at the framed opening. Here's what general contractors should confirm in dimensions, framing, and finishes before the steel ships.
Steel does not move once it is welded, so the framed opening has to be right before the stair arrives. The checklist is short, but every item on it has caused a missed install when it was skipped.
A custom steel staircase is fabricated to fit one opening in one building. The shop drawings dimension the stair to the millimetre, the steel gets cut and welded to those dimensions, and the finished stair ships to site as a rigid object that does not negotiate with the framing it lands in. The framed opening therefore has to be right before the stair arrives, and the most common reason a stair install slips a week is that the opening was off and no one caught it before the truck rolled.
The opening is the contract
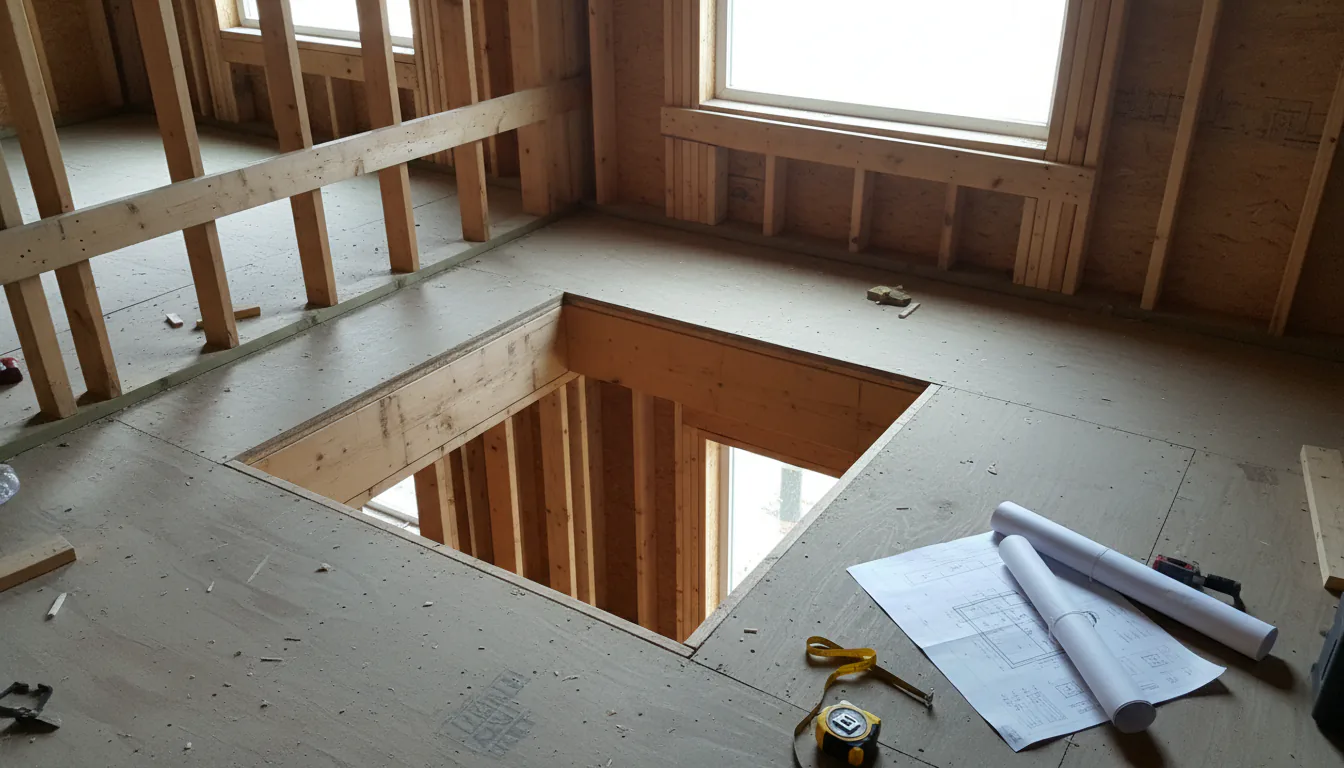
When a custom stair package goes into fabrication, the shop drawings include a stair opening drawing, a dimensioned plan and section showing the rough opening, the finished opening, the floor-to-floor heights, the reinforcement details, and any wall-anchored brackets. That drawing is the contract between the fabricator and the framer. The stair will be built to those dimensions, and the framer is responsible for delivering the opening to match.
In our shop the stair opening drawing is issued at the same time as the steel goes into fabrication, sometimes earlier. The earlier it lands with the framer, the easier it is to incorporate into the framing sequence rather than retrofit after the fact. The APA’s framing reference for stair openings is a useful general-construction primer on residential opening framing for any GC unfamiliar with the geometry, though every custom stair adds project-specific reinforcement that goes beyond the generic detail.
The three dimensions that actually matter
Out of every dimension on the stair drawings, three matter more than the rest.
The first is the floor-to-finished-floor height at the stair. This is the vertical distance from the top of the finished lower floor to the top of the finished upper floor, including every layer of build-up, subfloor, underlayment, finish flooring, in its as-built thickness. Every riser dimension in the stair is calculated from this number, and a 10 mm change in floor-to-floor distributes across the riser count and shifts every step by a fraction of a millimetre. That sounds small until the homeowner walks the stair and feels one riser that is noticeably different.
The second is the rough opening length in plan, measured along the stair’s centerline. This is the horizontal distance from the upper landing edge or face of finished wall to the wall or framing that the bottom of the stair lands against. Get this wrong and the stair either does not fit or sticks out into the space below.
The third is the rough opening width perpendicular to the run. This sets the stair width and the clearances to the adjacent walls. Too narrow and the guard hardware fouls the wall; too wide and the stair looks lost in the opening.
A fourth dimension, the squareness of the opening to the building grid, is a sleeper. A stair that arrives perfectly square will not look right in an opening that is 5 mm out of square at the top corners, and the visible tread-to-wall gap will be asymmetric.
Framing reinforcement is a separate package
The stair opening drawing usually carries a framing reinforcement package as a separate sheet, additional studs, headers, blocking, or hangers required to carry the stair load into the building structure. For a wall-anchored cantilevered stair, the reinforcement is substantial, often including a steel post in the wall or a continuous steel-plate backer behind the drywall. For a simple slab-bearing stair, the reinforcement may be limited to a beefed-up header at the top of the opening.
The reinforcement detail is structurally engineered. It does not get value-engineered in the field. We frequently see framers, GCs, or even other engineers second-guess a stair reinforcement detail in good faith, “the trim looks like it could carry it”, and the answer is always the same: the stair’s structural engineer specified the detail, and changes to it have to go through that engineer.
The American Wood Council’s Wood Frame Construction Manual is the reference most BC framers work to for the framing of stair openings in wood construction, and we coordinate the steel reinforcement with that framework. For steel-framed buildings, the equivalent reference is CSA S16 for design of steel structures, and the coordination is between the building’s structural engineer and the stair’s structural engineer.
Finish build-ups are the silent killer
The single most common reason a stair lands and the riser dimensions feel “off” is a finish build-up that changed between drawing and as-built. Drawings call out 15 mm engineered hardwood over a 6 mm underlayment over a 16 mm subfloor, total 37 mm. The actual install lands at 19 mm hardwood over 9 mm underlayment over 19 mm subfloor, total 47 mm. The 10 mm difference distributes across the stair as a tiny error per riser, and the top riser ends up either too tall or too short by exactly that 10 mm.
We ask GCs for a confirmed finish build-up at the stair location before the steel is cut. Confirmed means the homeowner has selected the finished floor, the supplier has confirmed the actual product thickness, and the build-up has been verified against the drawings. If the finished flooring has not been selected yet, we hold the stair at the shop until it is.
The same applies to the floor finish at the bottom of the stair. A polished concrete floor with no build-up is one elevation. A 25 mm thick stone floor on a thinset bed is a different elevation. The base of the stair is detailed to the finished floor, not to the slab.
The two-stage verification sequence
Our standard pre-install verification has two stages.
Stage one happens after the opening is framed but before drywall closes the walls. The framer or the GC sends measurements of the rough opening, length, width, squareness, floor-to-rough-floor, against the stair opening drawing. We check the measurements, flag any discrepancies, and confirm that the framing reinforcement is in place. This is the cheap moment to fix anything, open walls, accessible structure, no finishes at risk.
Stage two happens after drywall and finish flooring. The GC sends the finished dimensions, finished opening, finished floor-to-finished-floor, finished wall faces. We check these against the stair fabrication tolerances and confirm that the install can proceed. If either stage fails, we either correct the framing (stage one), or postpone the install while the issue is resolved (stage two). Postponing is expensive but cheaper than installing a stair that does not fit.
Mechanical, electrical, and lighting before the steel
The space around the stair often holds mechanical penetrations, electrical wiring for stair lighting, and rough-ins for tread lighting or guard-mounted fixtures. All of this has to be installed before the stair lands.
Stair tread lighting in particular needs to be coordinated early. Linear LED strips integrated into a tread or a stringer require a clean conduit path inside the surrounding framing, and that path has to exist before the drywall closes the wall. Our earlier piece on LED stair lighting integration in Vancouver covers the coordination in detail, but the headline is simple: if the conduit is not in the wall before drywall, the lighting either gets a surface-mounted compromise or the wall gets reopened.
The same applies to any mechanical that runs near the stair, ducts in the ceiling, plumbing in an adjacent wall, structural beams that frame around the opening. The stair opening drawing should be reviewed against the mechanical, electrical, and plumbing drawings at the same time, and any conflicts resolved before the stair package is finalized.
What the GC checklist looks like
For GCs we work with regularly, the pre-install checklist is short:
- Stair opening drawing reviewed against the as-built framing
- Framing reinforcement in place and inspected
- Floor-to-finished-floor height confirmed at the stair location
- Finish build-up at top and bottom of stair confirmed
- Squareness of the opening verified
- Mechanical, electrical, and lighting rough-ins complete inside any wall the stair will close against
- Site access confirmed for the stair delivery, door swing, hallway width, ceiling height through the delivery path
- Protection in place on adjacent finished surfaces
When every item is signed off, the install crew arrives with confidence and the stair lands in a single day. When items are skipped, the install becomes a series of negotiations between the steel that was already fabricated and the building that did not quite match. The cleanest path is the boring one, measure twice, confirm twice, and ship the stair only when both confirmations have come back clean.
Sources
- APA, Engineered Wood Construction Guide
- American Wood Council, Wood Frame Construction Manual
- CSA S16, Design of steel structures
This article is not a substitute for the project drawings, the engineer of record’s reinforcement detail, or the AHJ’s inspection requirements. Site verification and framing reinforcement should be confirmed by the structural engineer and the GC on every custom stair.
Related questions
What dimensions of the stair opening matter most?
Three: the rough opening length and width in plan, the finished floor-to-finished-floor height at the stair, and the squareness of the opening relative to the building grid. A 10 mm error in floor-to-floor changes every riser dimension. A 20 mm error in the opening length changes whether the stair fits at all.
Who is responsible for the framed opening?
The general contractor and the framer. Vancouver Stairs provides a dimensioned opening drawing in the shop drawing package, and the framer builds the opening to those dimensions. We do not adjust the opening on site, we adjust the stair to match what is there, within the limits of what was already fabricated.
When should the GC measure the opening?
Twice. First when the opening is framed but before drywall, to confirm the rough dimensions match the drawings. Second after drywall and any built-up flooring, to confirm the finished dimensions are within the tolerance the stair was fabricated to. If either check fails, we want to know before the install crew is dispatched.
What if the opening is wrong on install day?
It depends how wrong. Small errors, a few millimetres on length, minor squareness, can sometimes be absorbed in the install with shimming and final trim. Larger errors usually mean the install is postponed while the framing is corrected or the stair is re-cut, which is expensive for everyone. Pre-install verification is the difference.