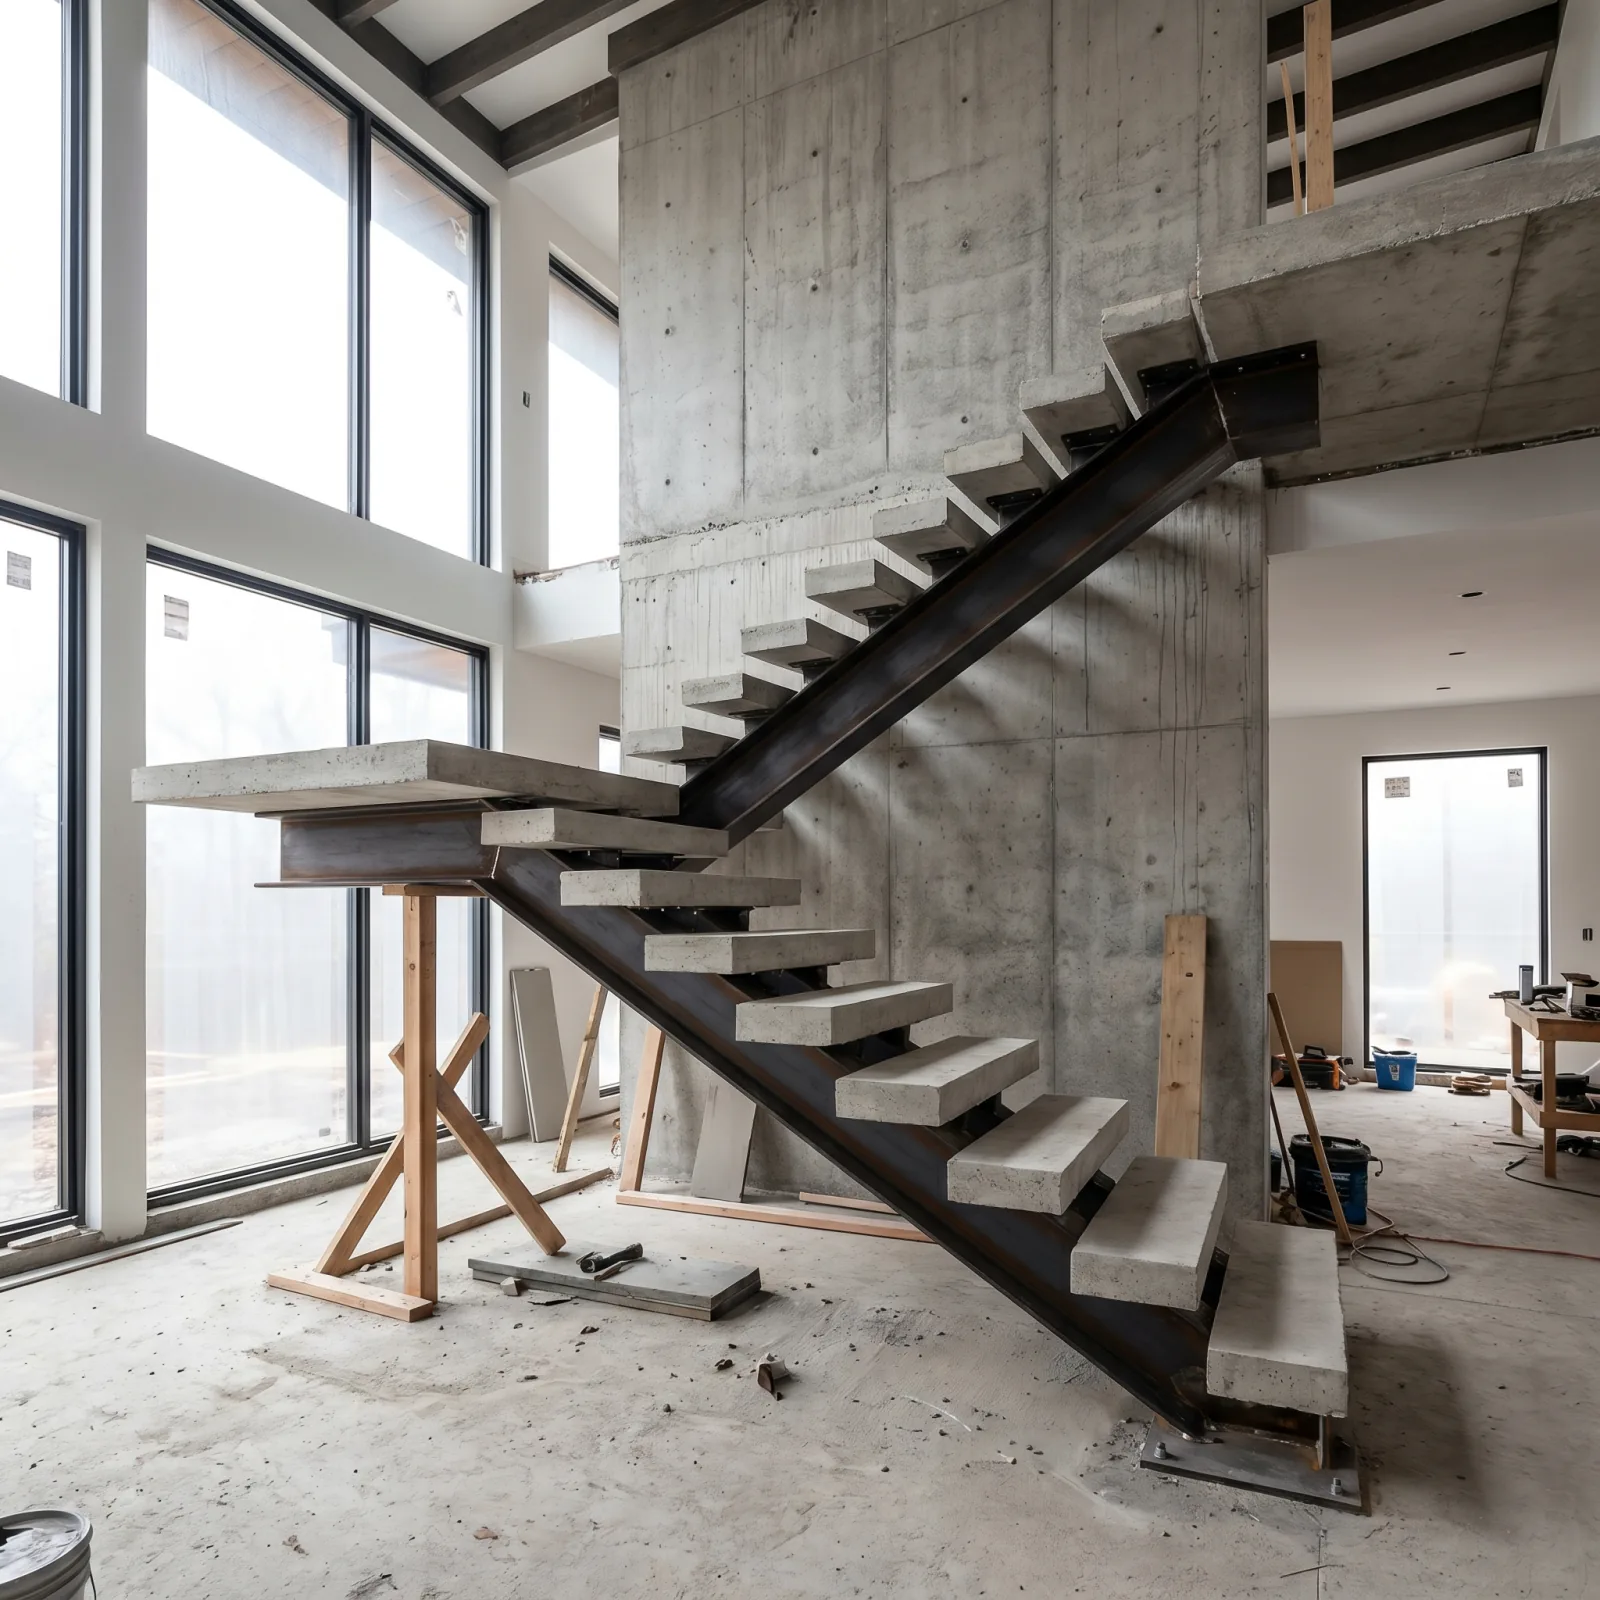
In contemporary Vancouver custom homes the staircase rarely stands alone. It is most often paired with a feature wall, stone slab, large-format porcelain, slatted wood, or full-height millwork, that the stair reads against. When the stair and the feature wall are designed together, the result is a single integrated architectural moment. When they are designed separately and forced together on site, the result is a stair that looks added-on and a wall that fights for attention. The integration work happens at the drawing stage, not the install stage.
The four common feature-wall pairings
Most feature-wall pairings on a custom Vancouver stair fall into one of four categories. Each combination has a different coordination problem to solve, and the right answer depends on which surface the eye should read first, the stair or the wall.
- Stone or large-format porcelain slab: a single tall surface behind a floating or mono stringer stair, the stair reads against a monolithic backdrop.
- Slatted wood (vertical battens): warmer, softer; visually breaks the wall into vertical lines that frame the stair.
- Full-height millwork: integrated storage, shelving, or panelling that meets the stair at specific reveal points.
- Backlit panel or feature lighting wall: indirect light behind the stair turns the stringer into a silhouette.
Cantilever and wall-mount strategies into a feature wall
A cantilevered stair that anchors into the feature wall is the most demanding integration. The wall has to contain engineered pockets that accept the tread cantilever moments, and those pockets have to be framed before any finish material is applied. If the feature is stone or porcelain, the panels are cut around the cantilever points and notched to fit. If the feature is slatted wood, the cantilever bracket lands behind the slats and the slat layout is designed so the bracket falls behind a slat, not between two. The structural work is hidden, but it must be there, and it must be engineered before framing is closed.
- Stone or porcelain: engineered wall pockets framed in steel or LVL behind the finish, finish panels cut around the cantilever points.
- Slatted wood: cantilever bracket lands behind a slat; coordinate slat layout against tread spacing at the drawing stage.
- Millwork: cantilever bracket integrated into the millwork carcase, the cabinetmaker and the stair fabricator collaborate on a single shop drawing.
- Backlit panel: cantilever bracket and electrical chase coordinated to share the same wall depth.
Reveal and shadow gap detailing
The junction between the steel stair and the feature wall is where the eye lands first. Three details usually decide whether the integration reads as deliberate or accidental. The reveal between the tread end and the wall: a consistent 6–12 mm shadow gap is the cleanest detail; flush is harder to keep true; anything wider reads as a tolerance issue. The reveal at the top of the stringer where it meets the upper floor or wall: the cleanest treatment is a continuation through to the finished floor with a separate cap detail. The reveal at the base plate where the stringer lands on the slab: a recessed pocket with a flush finish reads better than a surface-mounted plate. All three reveals have to be drawn before fabrication, they cannot be fixed in the field.
Material and trade coordination
An integrated feature wall and stair brings four trades into the same square metre of building: the stair fabricator, the stone or millwork supplier, the framer, and the electrician (if lighting is involved). The sequence is fixed: framing first, with engineered pockets per stair shop drawing; stair stringer install second, before any finish is applied; finish wall install third, around the installed stringer; tread and railing install last. Skipping that sequence, installing the feature wall before the stair, then trying to fit the stair to the finished surface, is the single most common cause of failed integrations.
- Step 1: framing with engineered pockets, confirmed against stair shop drawings before insulation and drywall.
- Step 2: stringer install, the stair structure lands first, on a protected floor.
- Step 3: feature wall install, stone, porcelain, slats, or millwork installed around the in-place stringer.
- Step 4: tread and railing install, last visit, after wall finish is complete and protected.
- Step 5: protection wrap removed at client walkthrough.
Lighting integration
Most feature-wall stair integrations include integrated lighting, either tread-edge LED strips, indirect uplighting behind the stair, or wall-grazing downlights from the upper floor. The wiring chase for these lights has to be coordinated in the wall framing and the stair shop drawing. Tread-edge lighting on a steel mono stringer is run through the inside of the hollow stringer if the stringer is sized to permit; otherwise it runs in a wall chase parallel to the stringer. Wall-grazing lighting from the upper floor has to be planned against the stair geometry so the light hits the steel correctly. Discuss the lighting design with the electrical designer at the same time as the stair shop drawing, not after.
Related questions
Can the stair attach directly to a stone feature wall?
Not to the stone itself, stone cladding is not a structural element. The stair attaches to engineered pockets in the structural framing behind the stone, and the stone panels are cut around the bracket points. The structural pockets are designed by the stair engineer and installed by the framer before the stone is applied.
What is the cleanest reveal detail between the stair and the wall?
A consistent shadow gap of 6–12 mm reads cleanest on most projects. Flush junctions are possible but require very tight tolerance control and are unforgiving of any settlement or expansion movement. Wider reveals read as a deliberate design choice when they are consistent everywhere on the stair, but inconsistent wider reveals read as a tolerance problem. Choose one strategy and apply it consistently.
How is the lighting wiring coordinated with the stair structure?
Lighting wiring is coordinated at the shop-drawing stage. Tread-edge LED strips run inside the hollow steel stringer (if structurally permitted) or in a parallel wall chase. Uplighting and downlighting wiring runs in the wall framing behind the feature finish. The electrical designer marks the wiring chases on the stair shop drawing before fabrication so the wall framing and the stringer are both ready to accept the lighting on install day.
Who manages the coordination between the stair fabricator and the stone or millwork supplier?
Typically the general contractor or the project architect. On larger custom projects the architect runs a coordination meeting at the shop-drawing stage with the stair fabricator, the stone or millwork supplier, and the framer. The output is a single coordinated shop drawing that shows the stair, the wall framing, the finish wall, and any lighting in their final relationship to one another. On smaller projects the stair fabricator and the millwork supplier coordinate directly with each other and brief the GC.
Discuss feature wall & staircase integration vancouver for a real project
Send drawings, photos, or a rough scope and we will help define the practical next step.