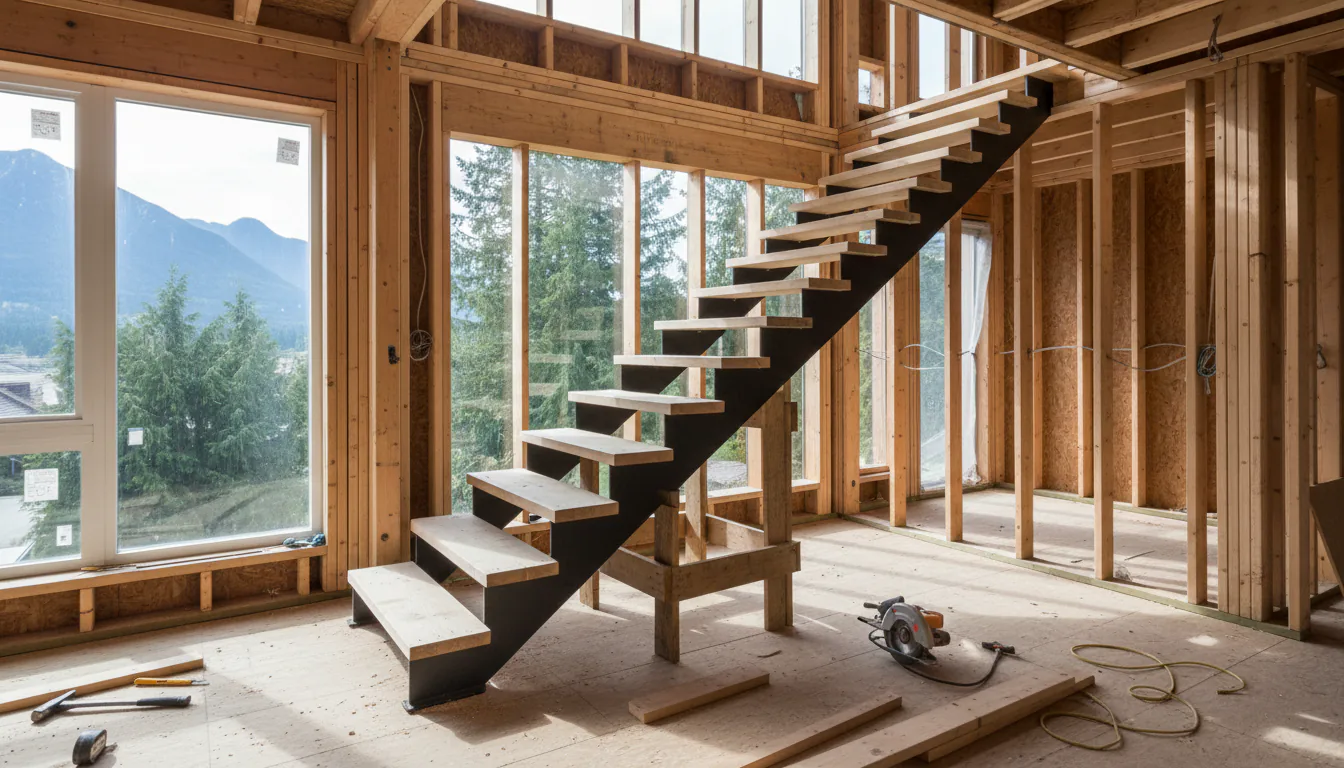
Most custom steel staircase problems happen before the install crew shows up, finished-floor heights that drifted, anchor locations that were never confirmed, opening dimensions that changed when framing was tweaked. By the time the steel is on the truck, the stair has to fit the opening the building actually has, not the opening the drawings showed. This page covers what a steel staircase installation looks like start-to-finish in a Metro Vancouver home, what the site needs to be ready for, and where the install schedule typically slips.
What 'install day' actually covers
A custom steel stair installation is rarely a single visit. The structural stringer lands first, ideally before drywall and finishes go in around it. The treads and the railing arrive in a later visit, after wall finishes are protected and any on-site staining or finish work is complete. Splitting the install into two or three visits is the norm on residential work because it minimizes finish damage and lets each trade work in the order the building wants.
- Visit 1, stringer install: structural beam(s) land, anchor to floor and upper-level connection, leveled and squared.
- Visit 2, tread install: treads dropped onto stringer brackets after wall finishes are in and protected.
- Visit 3, guard and handrail install: glass, cable, or picket guards plus handrail set as final-finish item before walkthrough.
- Each visit is its own scheduled day with its own protection requirements and its own access window.
Site prep checklist before the truck leaves the shop
The week before install, we confirm a short list of items with the general contractor or homeowner. None of these can be resolved on install day, if any are missing, the install gets pushed.
- Finished-floor-to-finished-floor height re-measured against the original drawing.
- Anchor points exposed and accessible, slab, header, or rim joist visible, not buried under finish.
- Stair opening dimensions confirmed and unobstructed, no scaffold, no stacked materials.
- Access path from delivery vehicle to stair opening cleared and protected.
- Floor protection materials on site, typically 6 mm hardboard over finished floors in the install path.
Crew size and equipment
A typical residential mono stringer or twin stringer install is a two- to three-person crew with hand tools, a transit or laser level, a portable welder for any field connection adjustments, and floor protection. Larger or heavier stringers, a long single-run mono stringer with a heavy section, a curved stair with a rolled plate stringer, or a monumental stair, may need a four-person crew and lifting equipment (gantry, telehandler, or crane for the heaviest pieces). The lift strategy is decided at the shop-drawing stage based on the section size and the building access; it is not a field decision.
How long the install takes
A straight-run residential mono stringer typically lands in one day. A switchback or twin-stringer stair with multiple landings runs two days. A curved or helical stair runs three to four days. Tread install adds half a day to a day, depending on tread material and the number of risers. Guard install, particularly glass, adds another half day to a full day. Most residential projects total three to five trade visits over a two- to four-week period, sequenced with finish trades. Schedules slip most often when finished-floor heights changed since shop drawings, when anchor locations are buried, or when access is blocked by other trades.
What can go wrong and how it is prevented
Three failure modes dominate the install-day problem list: dimensional drift, access problems, and protection failures.
- Dimensional drift: finished-floor heights changed between shop drawing and install, prevented by a re-measure visit one week before install.
- Access problems: door widths, hallway turns, or interim stairs that the steel can't pass, prevented by a documented access path on the shop drawing.
- Protection failures: finishes damaged during install, prevented by hard floor protection (6 mm hardboard), wall protection at corners, and a wrap on the stair after each visit.
- Anchor location problems: structural attachment point not where the drawing said, prevented by exposing all anchor points before the install crew arrives.
- Schedule conflict with other trades: drywall or flooring scheduled into the stair opening, prevented by a coordinated install date with the GC, not an open-ended window.
Owner walk-through and acceptance
At the end of the final install visit the stair is walked with the homeowner or the GC. We check guard heights against the BC Building Code minimums ([BC Building Code Part 9.8.8](https://free.bcpublications.ca/civix/document/id/public/bcbc2024/bcbc_2024dbp9s8) for residential guard heights and the 100 mm sphere rule on open risers), verify handrail continuity and graspability, check tread fit and any visible finish defects, and confirm the protection wrap is removed and the stair is ready for finished use. Any punch-list items are documented and scheduled, most stairs ship without any, but minor finish touch-up on a powder-coat or blackened steel surface occasionally needs a return visit.
Related questions
How long does a custom steel staircase install take?
Most residential mono stringer or twin stringer stairs install over three to five trade visits spanning two to four weeks, sequenced with drywall, flooring, and finish trades. The stringer typically lands in one day; treads and guards follow in later visits after wall finishes are in. Curved or monumental stairs take longer at every stage.
Does the homeowner need to be on site for install?
Not for the install itself, the install crew works with the general contractor or the site supervisor. The homeowner is usually present at the final walkthrough, which is scheduled after the last install visit. If the homeowner is the GC on their own project, they coordinate access and protection directly with the install crew.
What is the most common cause of install-day delay?
Finished-floor heights changing between shop drawing and install. A 25 mm change in floor build-up, a switch from hardwood to tile, an added in-slab heating layer, an extra underlayment, can mean the riser heights no longer work. A re-measure visit one week before install catches this; without it, the issue often shows up only when the stringer is being leveled, and the crew has to leave and come back after the stair is adjusted in the shop.
Who supplies the floor protection during install?
Typically the general contractor supplies floor protection for the install path; the stair fabricator supplies the protection wrap that stays on the stair between install visits. On homeowner-managed projects we can provide both as a line item in the quote. The protection plan is documented before the first install visit so there are no surprises.
Can the stair be installed before drywall, or after?
The stringer is best installed before drywall, anchor points are still exposed, the lift path is clear, and the stair structure is in place before any finish work happens around it. Treads and guards are installed after drywall and wall finishes are complete and protected. Installing the entire stair after drywall is possible but means craning through a wider opening and accepting longer site protection time.
Discuss steel staircase installation process vancouver for a real project
Send drawings, photos, or a rough scope and we will help define the practical next step.